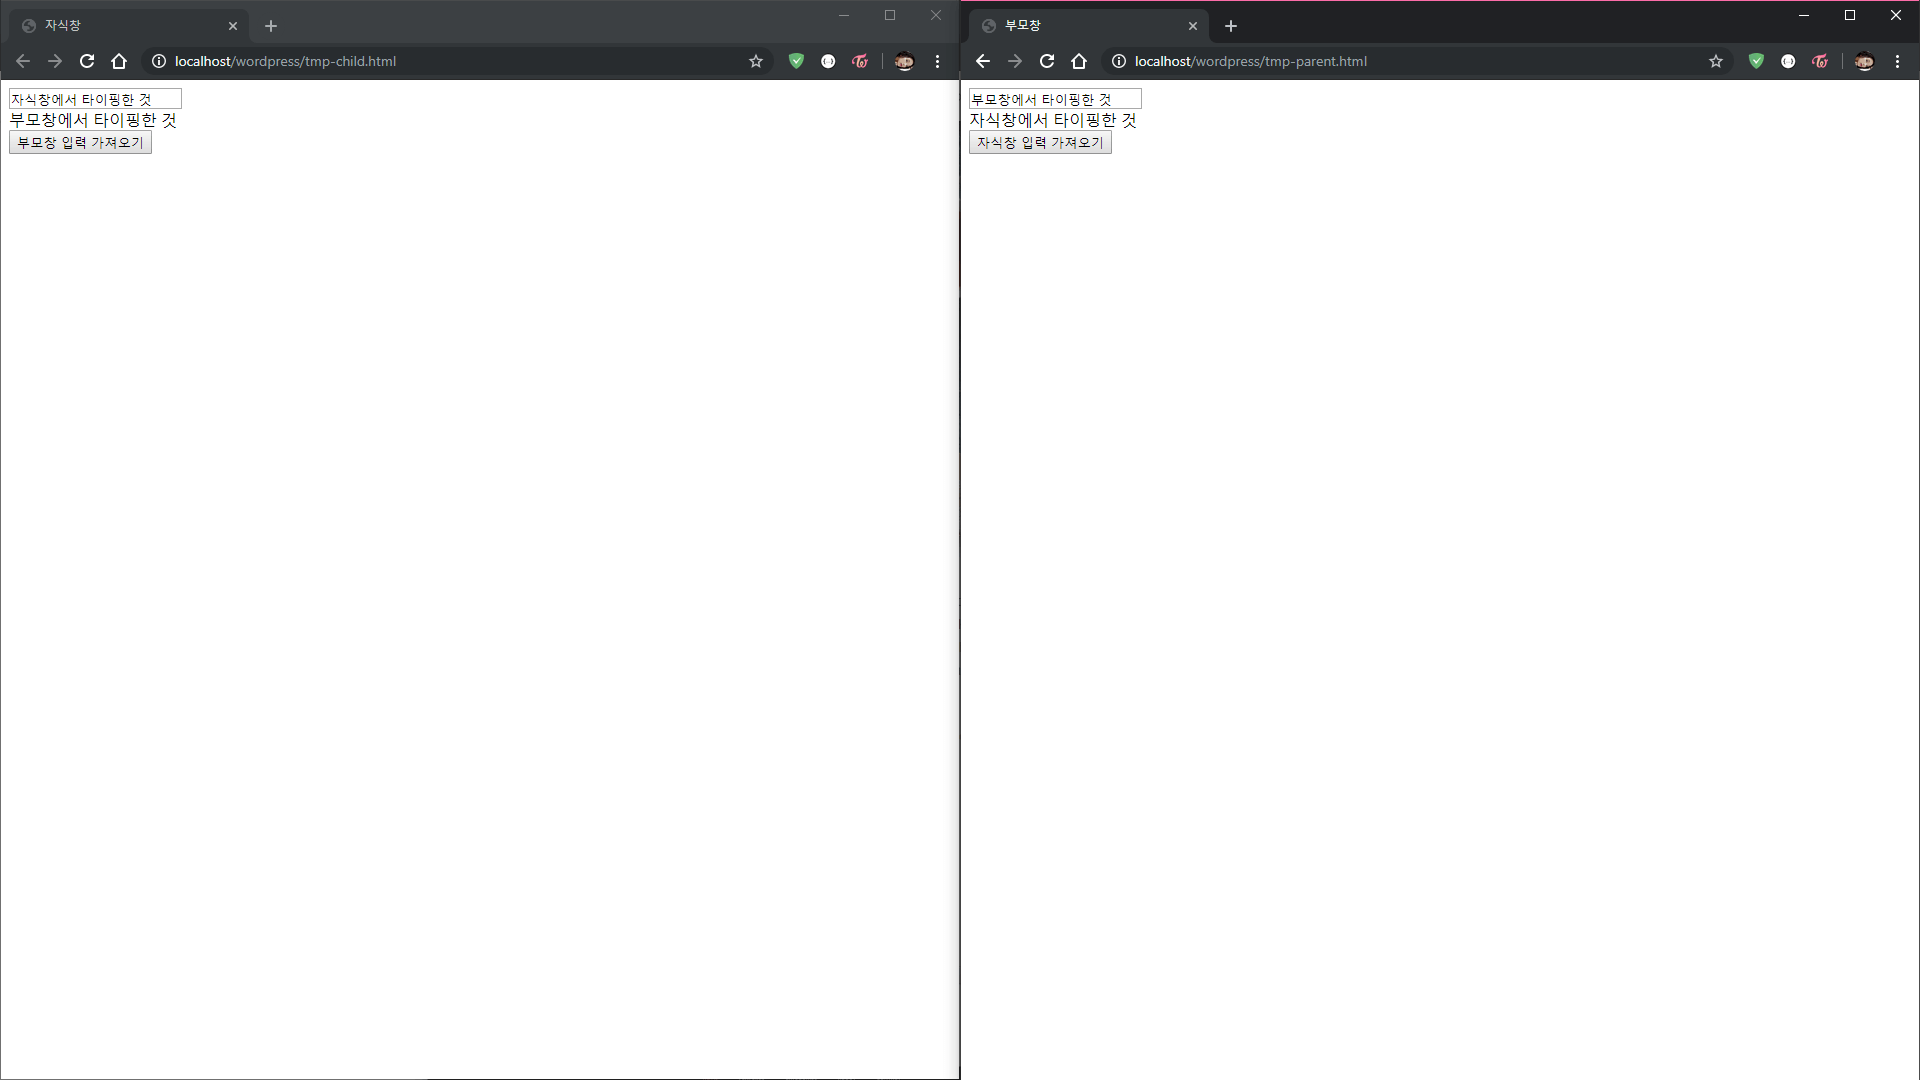
window.open() 혹은 a (anchor) 태그에 target="_blank" 어트리븃을 붙여서 연 윈도우와 원래 윈도우 간 정보 교환하는 방법입니다.
새 윈도우를 연 창을 부모창, 부모창에 의해 window.open()이나 a 태그로 열린 창을 자식창이라 칭하겠습니다.
부모창에서 자식창 접근
<!DOCTYPE html><html>
<head>    <title>부모창</title></head>
<body>    <input type="text" id="parentInput">    <div id="childOutput"></div><button id="getChildOutput">자식창 입력 가져오기</button>    <script>        const newWindow = window.open('tmp-child.html');                    document.getElementById("getChildOutput").addEventListener("click", () => {            document.getElementById("childOutput").innerText = newWindow.document.getElementById("childInput").value        })    </script></body>
</html>
window.open() 함수를 변수에 집어넣고(예시에선 newWindow), 해당 변수에서 정보를 가져옵니다.
변수명.document.querySelector(".element")와 같은 방식입니다.
자식창에서 부모창 접근
<!DOCTYPE html><html>
<head>    <title>자식창</title></head>
<body>    <input type="text" id="childInput">    <div id="parentOutput"></div><button id="getParentOutput">부모창 입력 가져오기</button>    <script>        document.getElementById("getParentOutput").addEventListener("click", () => {            document.getElementById("parentOutput").innerText = opener.document.getElementById("parentInput").value        })    </script></body>
</html>
따로 변수는 필요 없이 opener가 부모창을 리턴합니다
opener.document.querySelector(".element")와 같이 사용하실 수 있습니다.
길게 설명할 필요가 크게 없는 것들이라, 구구절절한 설명은 생략했습니다.
예시에서 보여 드린 것처럼 일반적으로 읽는 것만 가능한 게 아니라
opener.document.documentElement.classList.add("hello")
이렇게 부모창의 돔을 자식창에서 직접 조작할 수도 있습니다.


